Connecting a RUT956 Teltonika device
Article version 1.0
Prerequisites
- An RUT956 Teltonika device.
- Access to the RUT956 Teltonika device through the web-configurator tool.
- Successfully downloaded the OPC-UA package on the RUT956 device
- You have an account on the Init Data Collection Cloud.
- Successfully added a Generic MQTT device in the IoT Tree. See Adding an MQTT device in IoT Administration.
Preparing the RUT956
This guide focuses on sending data from an OPC-UA server to the Init Data Collection Cloud via MQTT.
It begins by describing how data is collected from an OPC-UA server and then outlines the process of transmitting the collected data to the Init Data Collection Cloud via MQTT.
If you have a RUT956 with an OPC UA Server and configured nodes, please proceed to the Setting up OPC UA Value Groups.
Setting up OPC-UA
In this guide, we will gather data from an OPC UA server hosted on a PLC that is accessible by the RUT956. The collected data is from a temperature sensor and a photoelectric distance sensor.
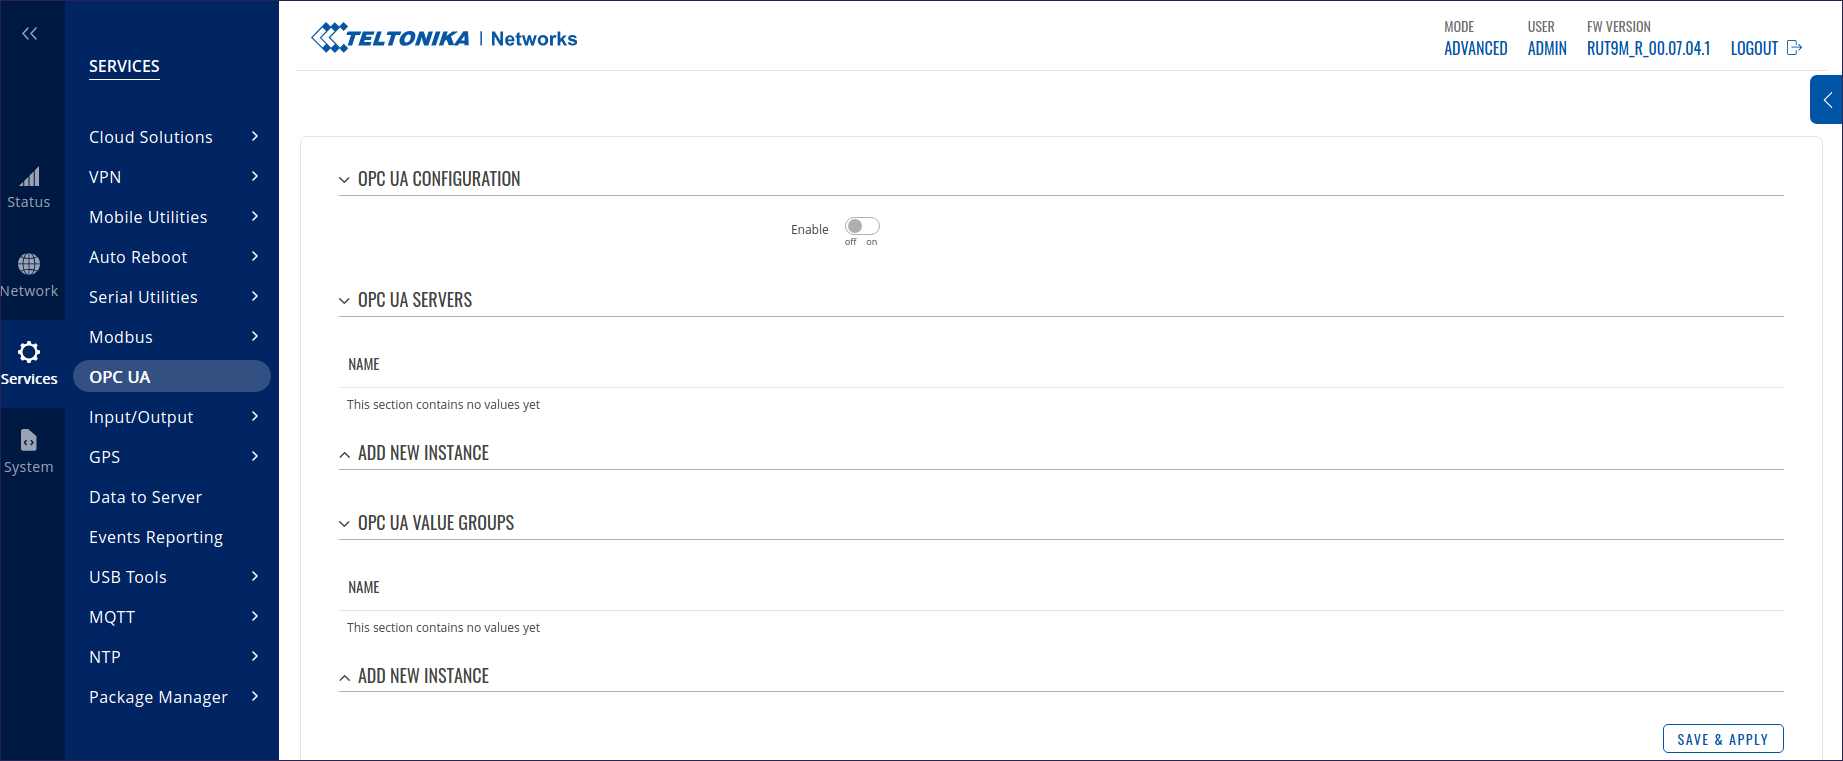
Start off by open the OPC UA service:
Unfold the OPC UA Servers and add a new instance by providing a name and click ADD:
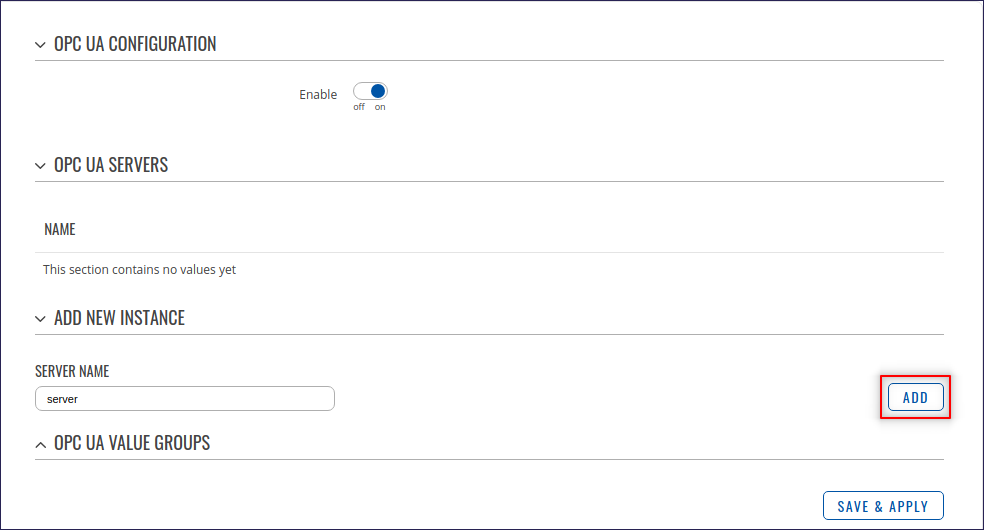
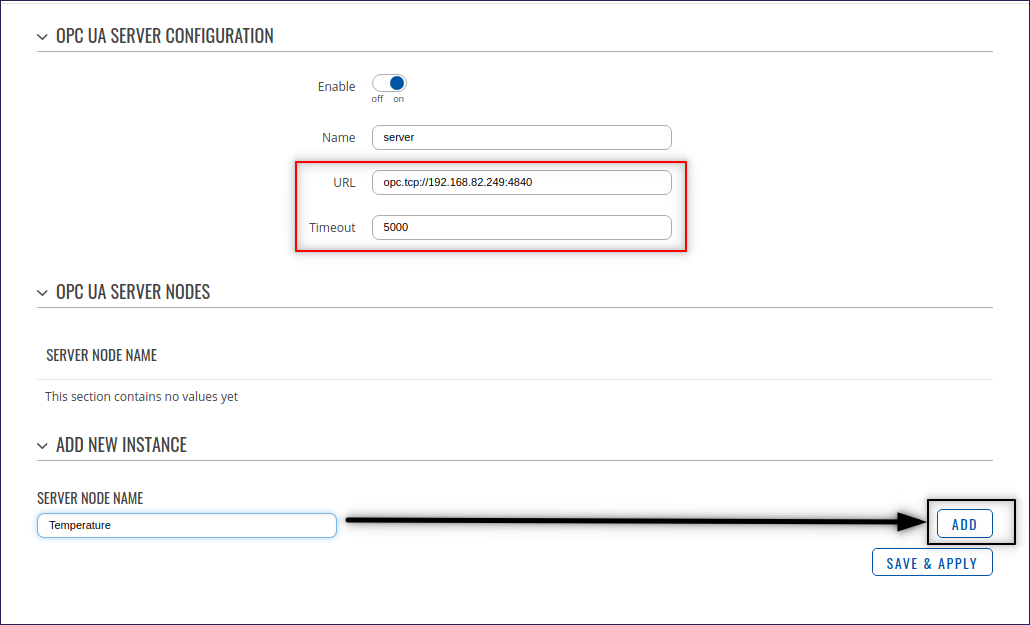
Enable the newly added server instance and input the endpoint URL and timeout (here we are using a timeout of 5000ms) in order to access the OPC UA server.
To add a server node (datapoint) enter an apropriate name and click ADD:
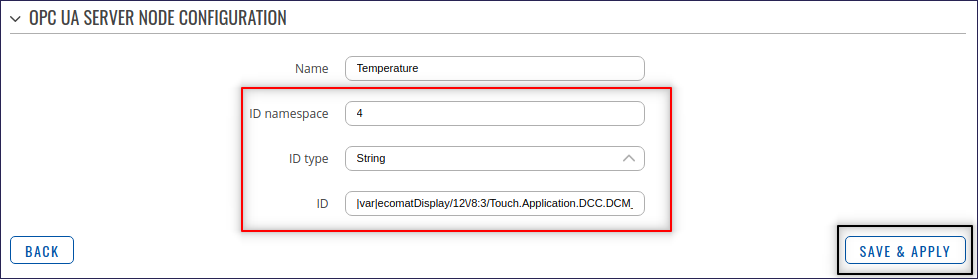
Input the required address in order to access the node on the OPC UA Server and click Save:
Add any required number of datapoints.
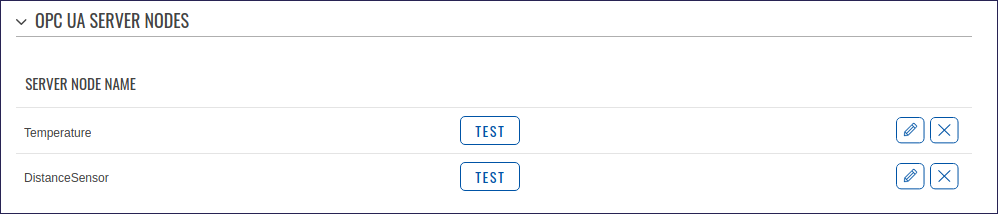
Now that the required datapoints have been added, the RUT956 OPC UA Groups can be setup.
Setting up OPC UA Value Groups
The purpose of setting up Value Groups is to allow mapping of OPC UA nodes to IDs, which will be used in the MQTT Data Format.
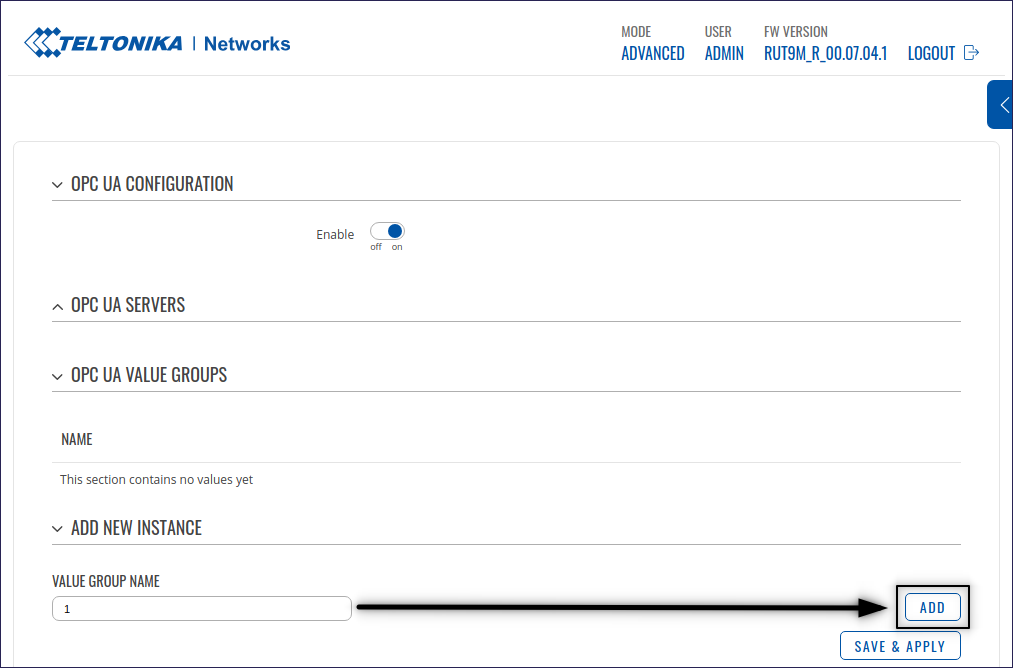
Start by unfolding the OPC UA Value Groups and add a new instance by giving it an unique ID (must be an integer). This ID will later be used when the data shall be sent to the Init Data Collection Cloud over MQTT. The ID used here is "1". When the ID has been provided continue by clicking ADD:
Enable the created group, and fill out the fields:
- Name: A unique integer ID
- Scheduling type: Period (only available)
- Period: custom (time between data retrieval in seconds)
- Failure mode: none
In this example we are collecting data from the OPC UA Server every 10s. The remaining fields shall remain empty.
Add a datapoint to the group by adding a new Value. Enter a Value name and click ADD:

The name of the Value serves no functional purpose. For simplicity you may use the node name as the Value name.
Enable the Value, select the correct OPC UA server and node, and then click Save:

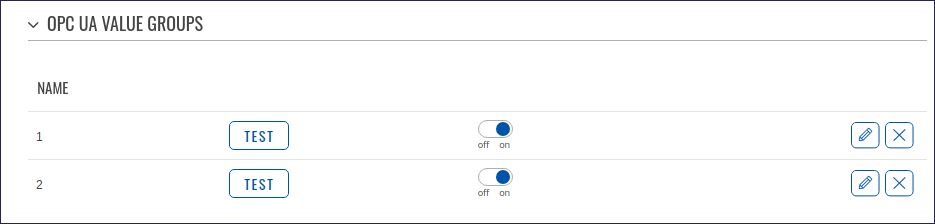
NOTE: Only one datapoint can be associated with a group in order to function with the Init Data Collection Cloud. This is to insure each datapoint has a unique ID. Hence, it is necessary to create an equivalent number of groups as there are datapoints. In this guide, we have two data points, and thus two groups are configured as 1 and 2 respectively:
 The IDs are not required to be in sequential order. However, they must be unique.
To test whether the group can collect data from the OPC UA Server click the Test button of the Group:

The group with ID 1 (temperature node) can successfully collect data from the OPC UA Server.
Setting up MQTT
This section will cover setting up MQTT using TLS certificates on the RUT956.
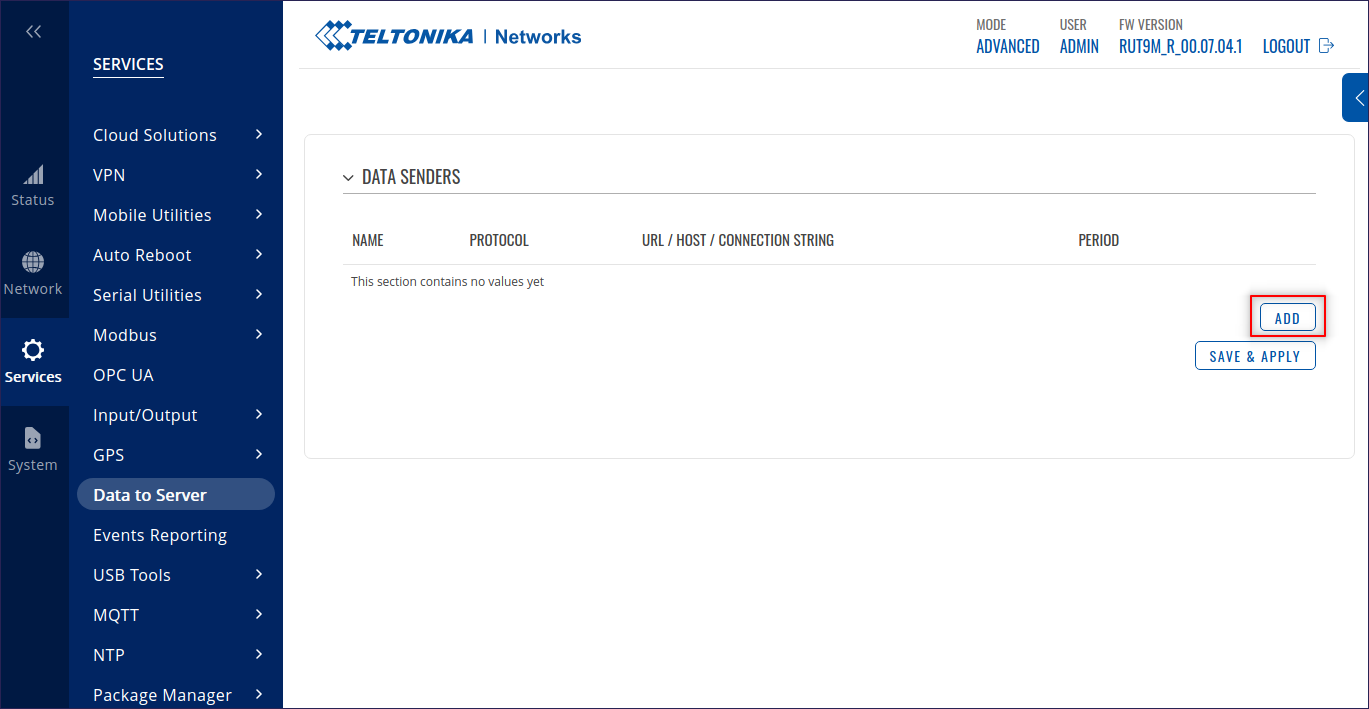
Navigate to the "Data to Server" tab. Then, click ADD to create a new data sender:
In the setup the following fields must be provided:
- Enable: On
- Name: custom
- Data source: OPC UA
- Protocol: MQTT
- JSON format:
{"data": [{"t": %t000, "id":%n, "v":"%x"}]}* - Segment count: 1
- Send as object: On
- URL / Host / Connection string: mqttbroker.inuatek.com
- Port: 8883
- Keepalive: 60
- Topic: Enter the MQTT topic which was provided when the device was added on the DCC.
- Client ID: Enter the device IMEI
- Period: Choose a frequency for sending data, e.g. 1 (unit is seconds)
- QoS: 0
- Data filtering: off
- Use TLS: On**
*The JSON format uses padding on the timestampt to achieve a timestamp in milliseconds. If the timestamp is already in milliseconds the "000" can be omitted.
**The following section will cover TLS and uploading certificates.
Click Save & Apply.

Uploading certificates
In the Data Sender setup, select the TLS Type "Certificate based". Then, upload the CA, client certificate and client key which were provided by the DCC upon device creation:
- CA file: ca.crt
- Client certificate: client.crt
- Private key: client.key
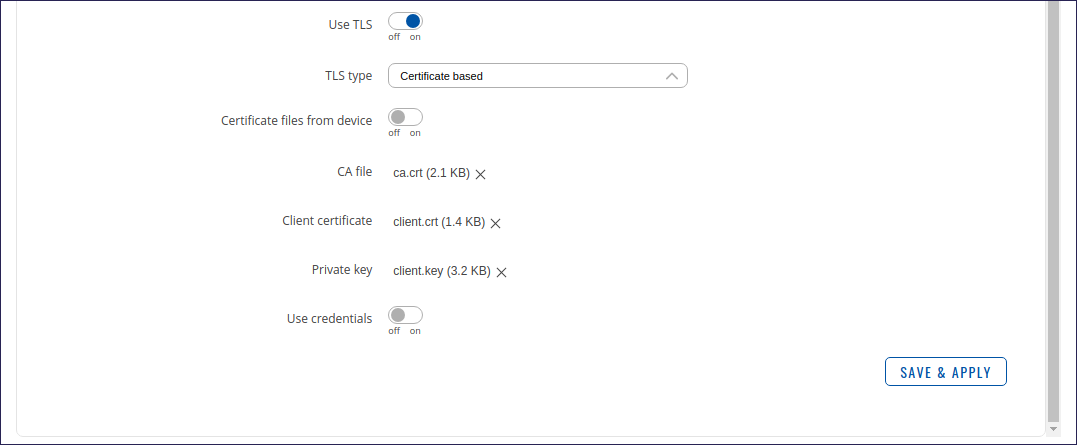
When the certificates have been upload, click Save & Apply.
The device should now able to connect to the DCC using MQTT TLS.
Creating an IoT Configuration for a RUT956 device
If you have successfully configured the Data Sender and uploaded your certificates, the device should be able to connect to the MQTT Broker. Data will not be present in the DCC unless an IoT Configuration has been made, see Creating an IoT Configuration.
If you are creating a new IoT Configuration you may start with the simple configuration that was created when you created the device on the DCC. Again, remember to configure the MQTT topic of the configuration correctly, see MQTT Base Topic.
Name Indexes
The IDs created in Setting up OPC UA Value Groups will be used in the IoT Configuration. Below is an example Sample Point for the Temperature node which was configured to have ID 1:
{
    "SampleDataType": "int16",
    "SampleDescription": "External temperature sensor",
    "SampleName": "External Temperature",
    "SampleUnit": "°C",
    "CustomNameIndex": 1
}
Only data from Value groups which have an entry in the IoT Configuration will show up on the DCC.